If you're into modding, then re-texturing is perhaps the most fundamental of things that you should learn how to do first. Today I'll walk you through how I typically re-texture my stuff, using the Unwrap UVW modifier of 3ds Max. You can replicate this method with pretty much anything, so I'll try to keep things simple here.
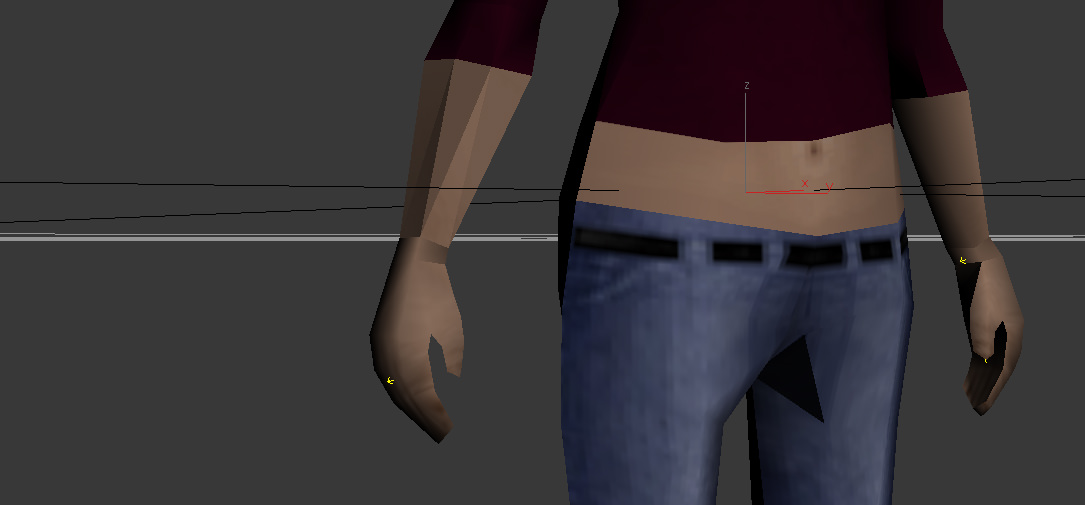
In this tutorial, as you can see from the picture below, I've opened up one of my own mods. What we're gonna do is re-texture the white skin on its right wrist into a wristband of some sort. Seems complicated, but it's actually very easy, and shouldn't take more than 2 minutes for someone who's experienced.
Okay, first thing's first, we import the .dff into 3ds Max. We enter the Kam's Script DFF IO panel, go to Import DFF, and do what we've always done - we tick the A and .png buttons, then hit Import DFF. Select and then import your file. Apply your textures, here's how I do it: Press F10, then Render. You'll be prompted with a Missing External Files window, press Browse then Add, and enter the folder in which you've exported your textures in .png format. Press Use Path, then OK, OK again if you're prompted with another window, and then Continue. Close both of the recently opened windows, then click on the gray screen where your mod is. Press M, then on the upper panel panel of the window press Material, Show Materials in Viewport As, and then Standard Display with Maps. Sounds complicated, I know, but it's actually very easy, and is better than any other method out there. If you practice this long enough you'll be able to do it in less than 10 seconds. Anyway, here's what we're gonna be working with:
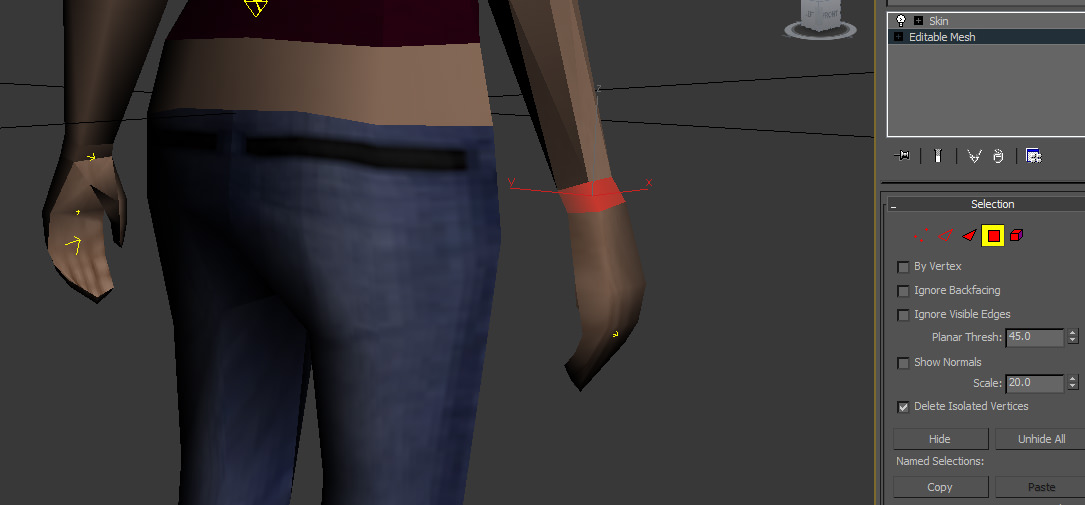
So, what we do now is select the polygons of what we want to re-texture. To do this, we open up Editable Mesh after clicking on the skin, we press Yes if a window pops up, and then we click on one of the red icons that become available. I won't describe what each of them does because you'll learn that eventually through tinkering, but for now we're gonna pick the one that's labeled Polygon. After we do that we just select what we want to re-texture, in this case the wrist.
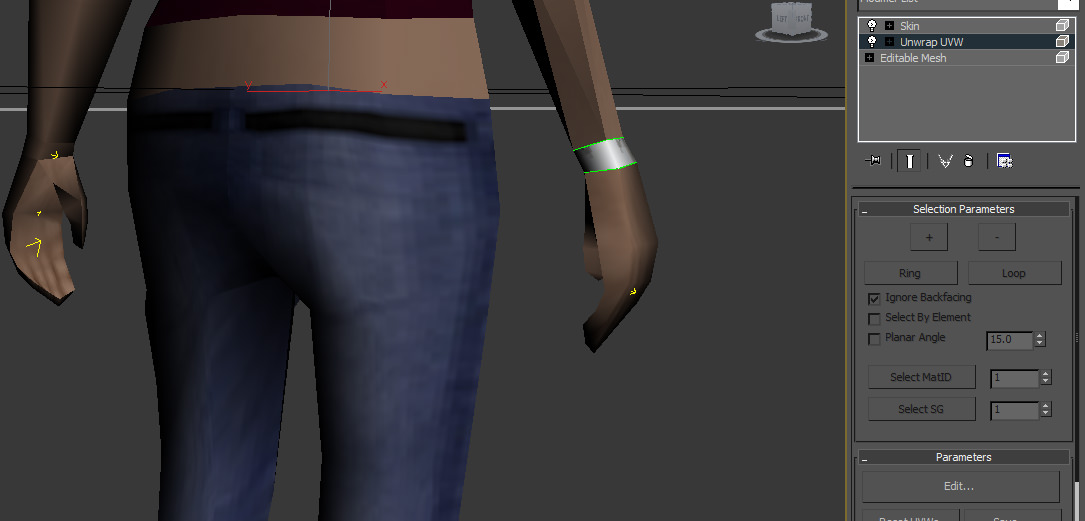
Drag and drop your new texture onto the selected polygons. It may look weird at first, that's okay - we're gonna be turning the white-looking thing you see below into a golden wristband. Click on the white arrow button next to Modifier List, which is directly above Skin and Editable Mesh - this will bring out a list of modifiers that you can use, but we only need Unwrap UVW in this case, so find Unwrap UVW and click on it. Things should look like this after you do that:
See the new Unwrap UVW button that we got right under Skin and above Editable Mesh? Click on the black square icon next to its name and you'll be showed a drop-down list with Vertex, Edge and Face available in it. Vertex should automatically be selected by default at that point. If your polygon selection from earlier has become fully red instead of just a green outline, then that means everything is okay and you should proceed. If it's still only a green outline however, then click on Vertex manually. Either way, now you should be done, so click on the "Edit..." button under Parameters to be taken to the Edit UVWs window (which I advise you to minimize, typically it takes up the entire screen by default). Anyway, your screen should now look like this:
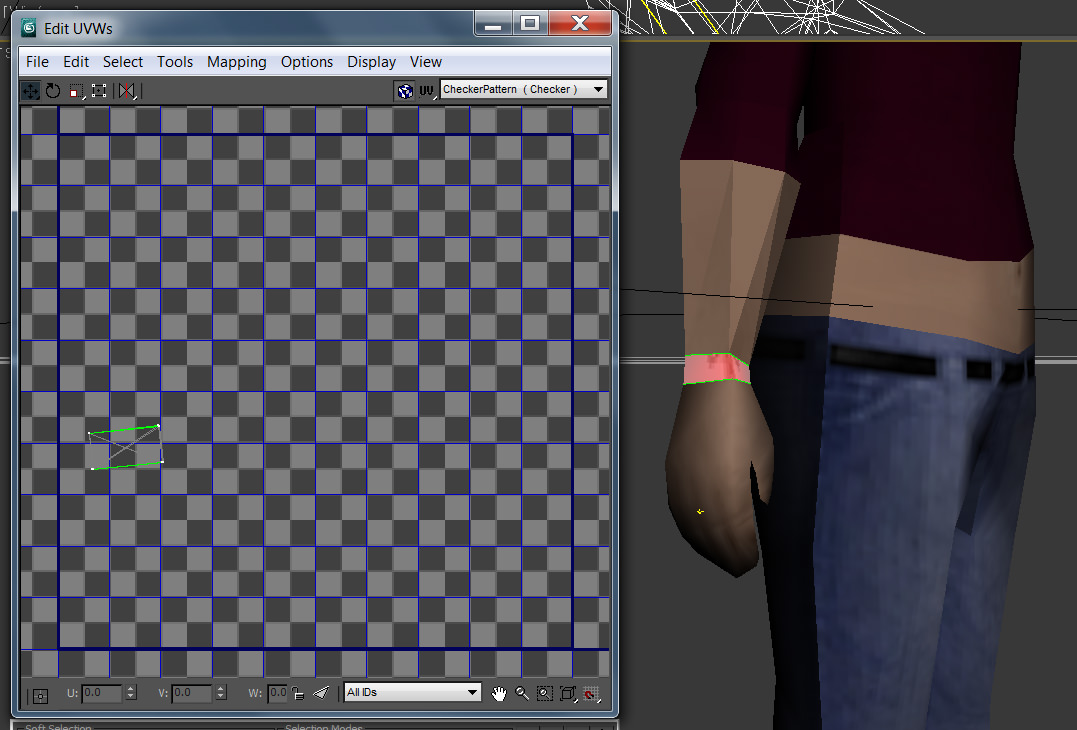
See the CheckerPattern thing at the upper right side of the Edit UVWs window? Click it and then select your texture's Map. This is the result in my case:
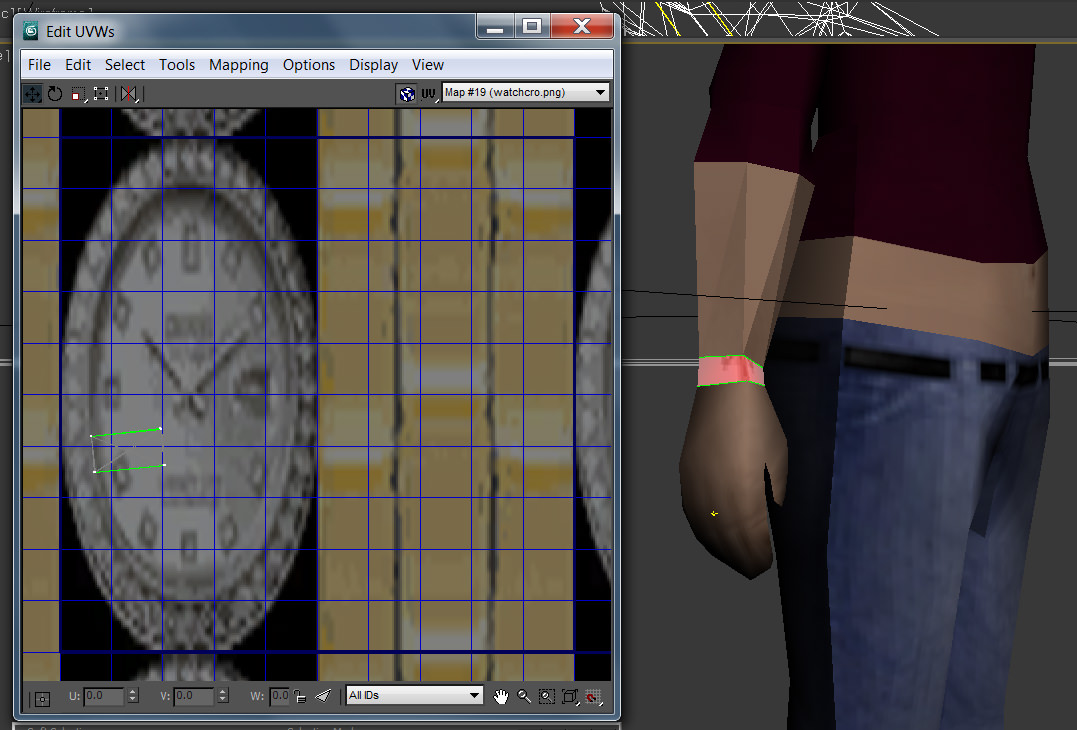
The green outline with white dots on the texture is what we're gonna be working with. The green lines show us what part of the texture our polygons take up. The white dots are our vertexes (if you don't know the role of vertexes in 3ds Max, well, they're pretty much the starting and ending points of polygons), that's what we're gonna be modifying soon.
There is a wide variety of tools available to you in the Edit UVWs window at this point. I'd suggest tinkering around on your own to see works best in your specific case.
Some of the more basic options are Move, Rotate, Scale and Freeform Mode - these are simple enough to use and can be found on the main toolbar with ease. If you're working with shirt textures and the like, elements with many curves on them, then you could also go to Tools and check out the Relax feature. It's very helpful at times, but takes experience to get used to. You can also flip and mirror the way your textures are applied, again via Tools - those two options can be very handy when you're dealing with default GTA:SA textures, which tend to be buggy. I'd also suggest tinkering with Weld, it's helpful when you're too lazy to align vertexes together manually.
Anyway, that was a short overview of 99% of the tools that you'll ever need in the Edit UVW window. I won't show you how to use each because that's better off being tinkered with and explored on one's own. So, back to our little tutorial - we select all of the vertexes with a drag-box and then just resize, rotate and move everything around using the Freeform Mode until the polygons fit our wristband texture and we're satisfied with how everything looks.
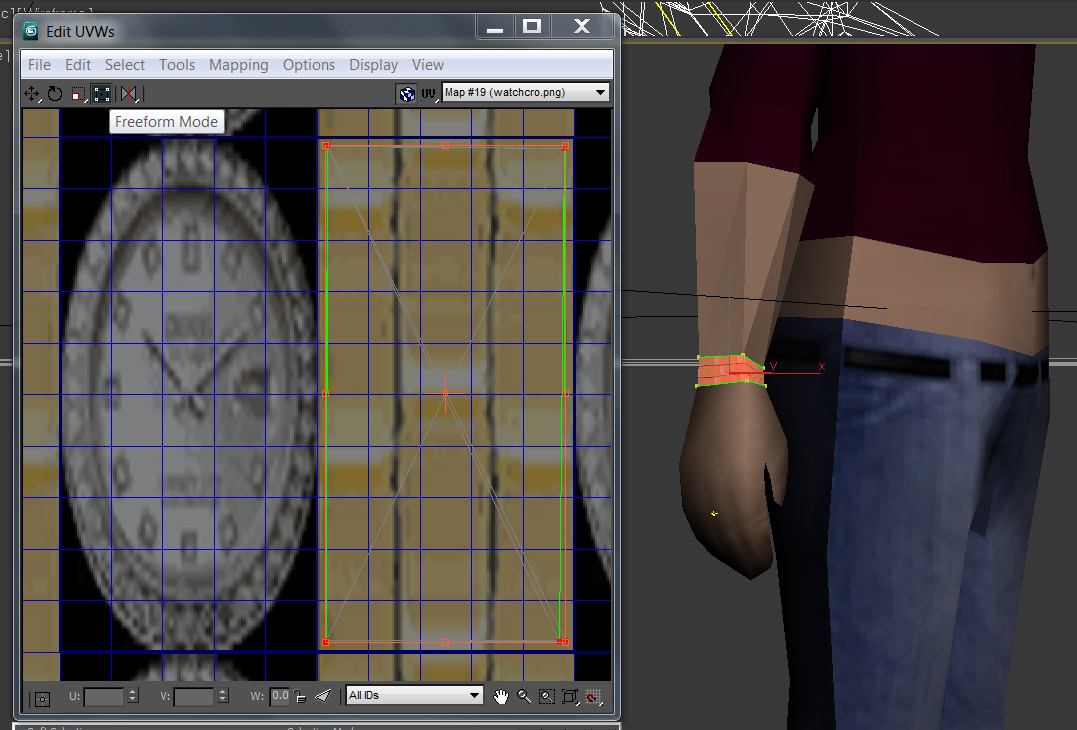
Notice how everything looks nice and clean on the model? It really looks like a golden wristband now, so that means we're done. Next, let's save everything up. To do that, close the Edit UVWs window, right click on the Unwrap UVW modifier and then press "Collapse to". If you're prompted with a window then press Yes, and well, that's pretty much it - our skin has been re-textured successfully, we turned her bare wrist into an actual wristband! Woohoo.
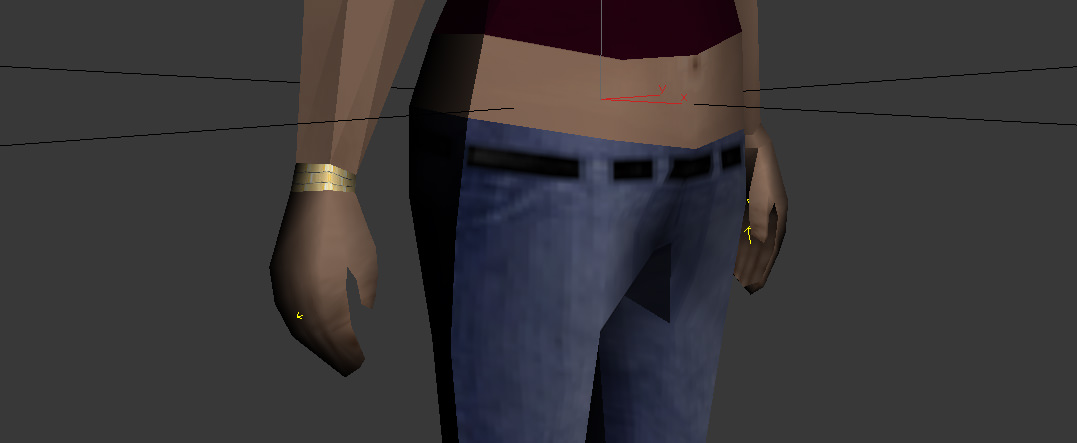
All that is left for us to do is export the skin and add our new texture to its txd file. To export your dff, enter the Kam Script panel, click DFF IO and then, while the skin (not its bones) is selected, press Bones/Skin Export. To add your new texture to the skin's txd file, first open the file in question with TXD Workshop (mine is 5.0). Then, press Image on the toolbar, New, and select 32 BPP. Import the new texture over the recently created 32 BPP template. Double-click on the texture once it's imported to change its name to what it originally was in 3ds Max, tick Compressed and then hit Ok. That's all, and make sure you click Save Txd. Also, don't tick Alpha is used unless you really did have transparent background in your png, else the model wouldn't load properly in-game. Either way, I hope you enjoyed the guide, have fun modding!